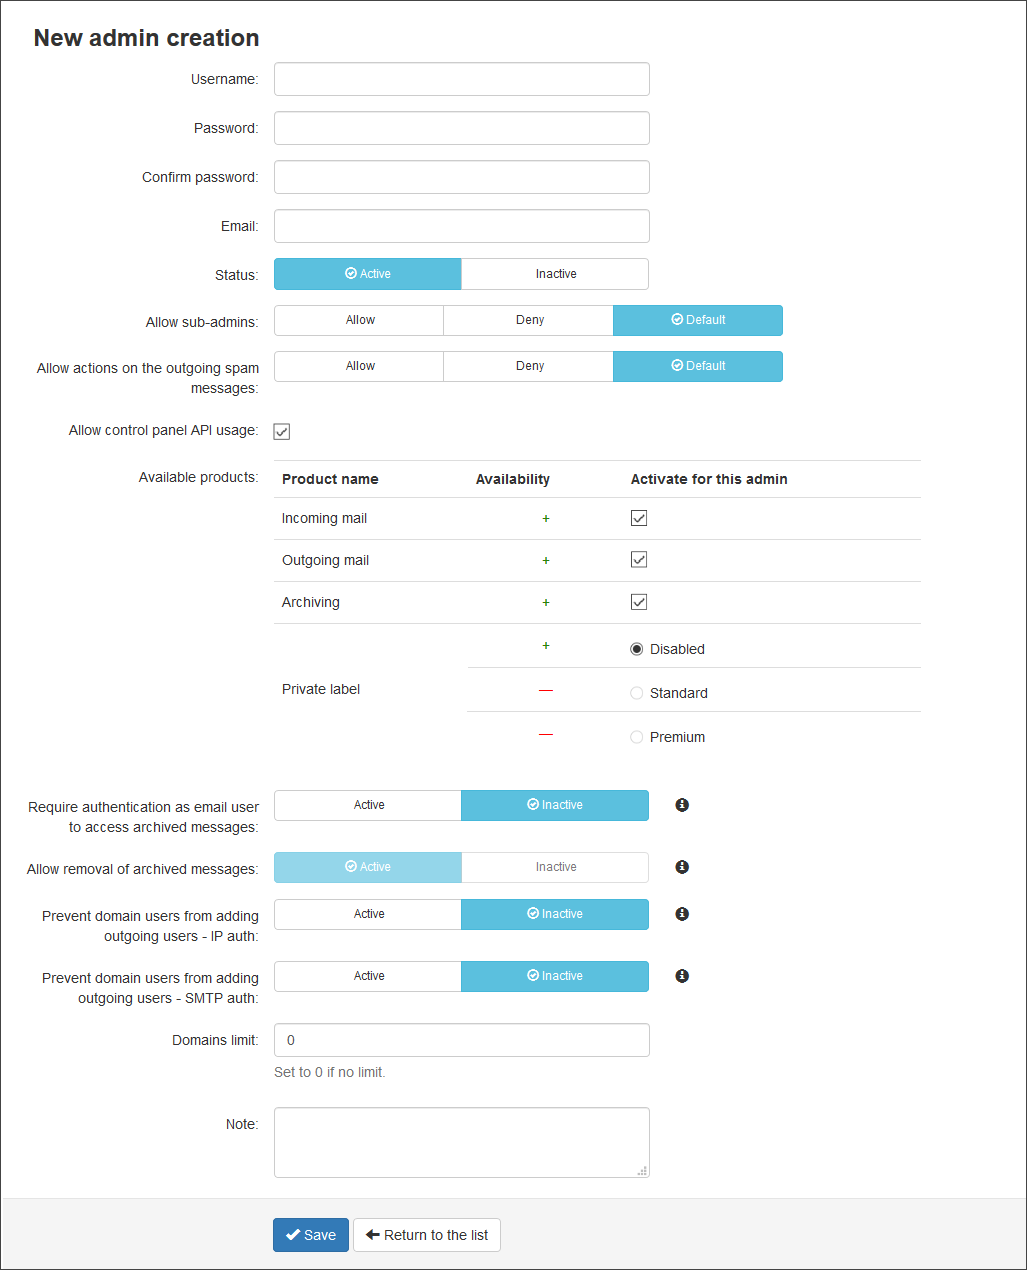
To create an Admin user you must be an Admin user yourself and have the permission to add other Admin users.
A Sub-Admin is an Admin user created by another Admin user (the Sub-Admin users parent). The Admin user creating the account has control over the access given to a Sub-Admin that they create. Effectively, they are the same - a Sub-Admin user can have the same rights as the Admin user.
To add an Admin user:
- Log into Spam Experts
- In the Admin Level Control Panel, click on Users & Permissions > Manage admins
- To add users individually, click on Add to open the New admin creation page
- Enter details for the new user and select the appropriate settings. The following Fields/Options are available:
- Active - Activates the user so they can access the system
- Inactive - Inactivates the user so that they cannot access the system
- Allow - The user can create sub-admins
- Deny - The user cannot create sub-admins
- Default - The user inherits the properties of the parent Admin user
- Allow - The user can action outgoing spam messages found in the Outgoing Log Search e.g. Release, Train spam, Train not spam
- Deny - The user cannot action outgoing spam messages
- Default - The user inherits the properties of the parent Admin user
- Incoming mail
- Outgoing mail
- Archiving
- Private Label - Custom branding is configured in this area of the application
- Disabled - the Admin and any sub-admins cannot access custom branding
Disabling Private Label will prevent all email user OAuth/SSO logins to the Spam Experts control panel
- Standard - only the first level of sub-admins created have access to set up custom branding in Spam Experts, any lower level admin users, do not have this access
- Premium - all sub-admins created have access to set up custom branding in Spam Experts
- Disabled - the Admin and any sub-admins cannot access custom branding
- Active - The user will not be able to view/export archived message content unless they authenticate at Email level and are viewing their own messages. When Active, sub-admins cannot over-ride this
- Inactive - The user will be able to view/export all other user's archived message content
- Active - This provides the user with the ability to delete archived messages from Spam Experts
- Inactive - When inactive, users are unable to remove archived messages
- Active - The domain users will not be able to create an outgoing user where authentication is done by IP
- Inactive - When disabled, domain users are able to create an outgoing IP authenticating user
- Active - The domain users will not be able to create an outgoing user where authentication is done by SMTP auth
- Inactive - When disabled, domain users are able to create an outgoing SMTP authenticating user
- Click Save
You can add multiple users using the Upload CSV file link or add each user individually
| Field/Option | Description |
|---|---|
| Username | The user's username |
| Password/Confirm password | The user's password |
| The user's email address | |
| Status |
|
| Allow sub-admins |
|
| Allow actions on outgoing spam messages |
|
| Allow control panel API usage | Allows the user to execute any of the API calls listed in the Control Panel API Calls page - see View Control Panel API Calls. |
| Available products |
Choose which products the user can access: |
| Require authentication as email user to access archived messages |
|
| Allow removal of archived messages |
|
| Prevent domain users from adding outgoing users - IP auth |
|
| Prevent domain users from adding outgoing users - SMTP auth |
|
| Domain's Limit |
How many domains this admin can add. If you want to limit the number to two domains, then you can set the limit to 2, otherwise use 0 for unlimited domains. The limit is shared with your own limit. For example, if your license is of 20 domains, you cannot set the limit to 0 for a Sub-admin. You can set it to 20, however this means that you will be unable to add domains on your Admin account and all new added domains will be attributed to the Sub-admin account. |

